
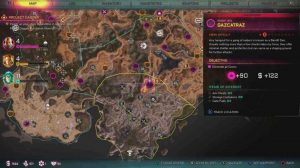
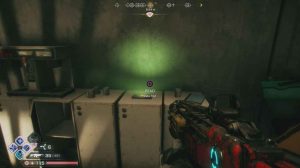
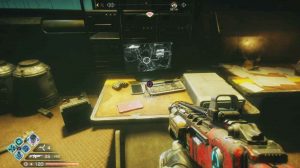
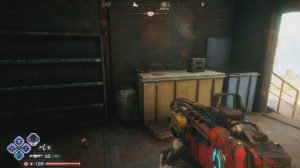
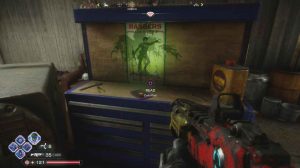
Data Pads are an optional collectible in Rage 2. Collecting them is incredibly useful as doing so will reveal new activities on your map, as well as unlock additional missions. There are a lot of Data Pads scattered throughout the wasteland and the guide below is split into the regions of the game showcasing all of their locations.
- Broken Tract
- Eden Space Centre
- Razorneck Ravine Bandit Den
- Puggy’s Lookout Exploration Location
- Hillside Roost Exploration Location
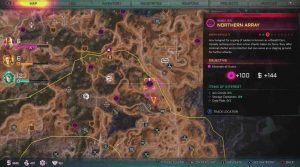
- Northern Array Bandit Den
- Snaker’s Crib Exploration Location
- Death Ravine Exploration Location
- Mutant Bash TV: Killbox Meat Grinder
- Recon Exploration Location
- Shrine Exploration Location
- Gunbarrel
- Lost Cause Exploration Location
- Green Side Lookout Exploration Location
- Bridge Block Road Choker
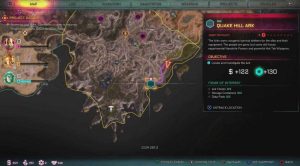
- Spikewind Ark
- Torn Plains
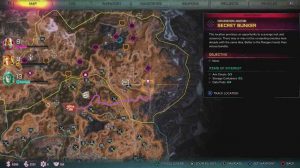
- Secret Bunker Exploration Location
- Pit Stop Bar Exploration Location
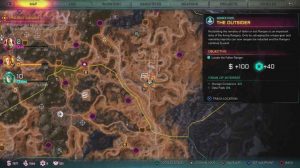
- The Outsider Ranger Echo
- Chazcar Derby: Torn Plains Track
- Dead Diner Exploration Location
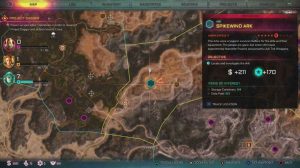
- Strongbox Ark
- Recharge Station Delta Repowering Station
- Forward Command Post Bandit Den
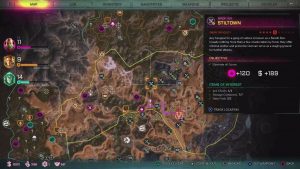
- Stiltown Bandit Den
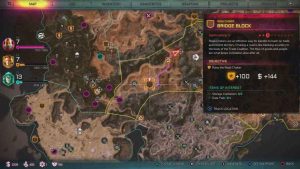
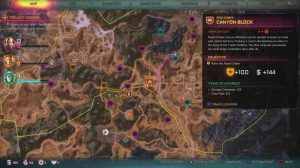
- Canyon Block Road Choker
- Prime Town Mutie Nest
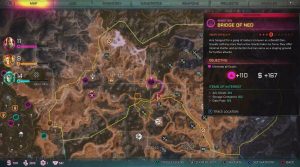
- Bridge of Ned Bandit Den
- Mechanics of Wasteland Exploration Location
- On The Crack Exploration Location
- Quick Stop Exploration Location
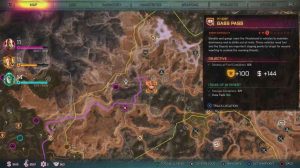
- Gass Pass Pit Stop
- Wellspring
- Wellspring (Only Obtainable During And After The Wasteland Celebrity Mission)
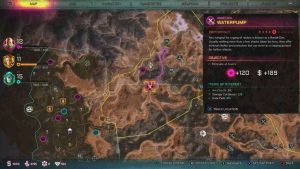
- Waterpump Bandit Den
- Sekreto Wetlands
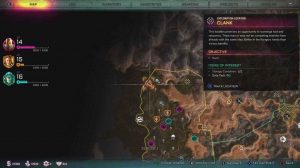
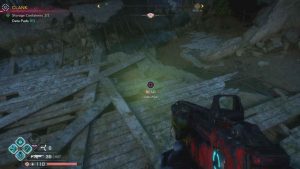
- Clank Exploration Location
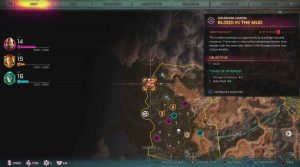
- Blood In The Mud Exploration Location
- Mutant Bash TV: Slippery Nipple Blasting Range
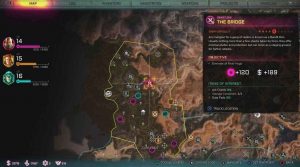
- The Bridge Bandit Den
- Lagooney
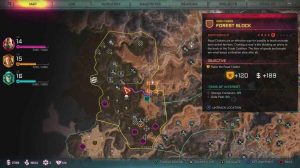
- Forest Block Road Choker
- Chest Hollow Bandit Den
- Shoals Bandit Den
- Big Willy’s Scrapyard Exploration Location
- Assblaster’s Junkyard Bandit Den
- McBoatface’s Boatery Bandit Den
Twisting Canyons Data Pads
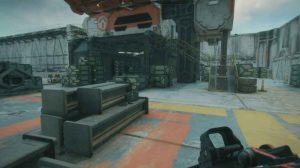
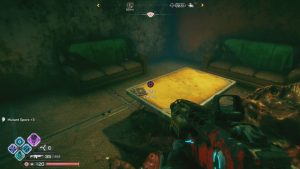
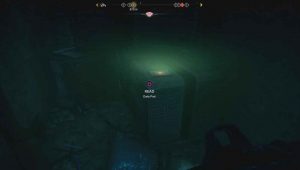
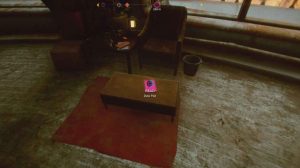
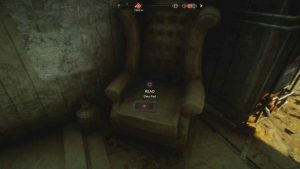
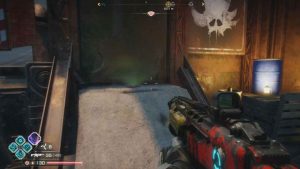
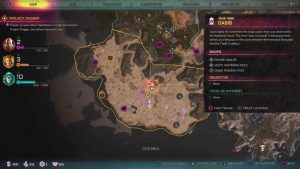
The first four Pads in the Twisting Canyons can be found in Vineland, which is the starting area of the game. After the battle with The Authority has concluded and you have talked to Lily, turn around and head to the left side of this large structure shown below. At the back corner, you can find the Prowley’s Project “Legacy” Log.
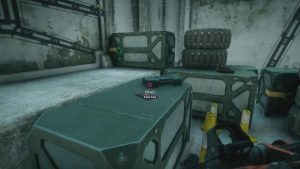
Head back to Lily and walk to the right side of the rubble she is standing next to. Resting on a box, against the rubble on the right, you can find the Ranger Report: Ravine Ambush Site Data Pad.
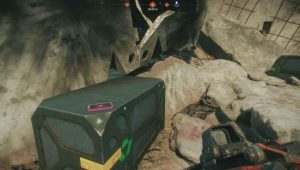
From that Data Pad, look on the opposite side of the large container next to you. By the Mutant Crusher’s hand, you can find the Data Pad, Vineland Refueling Base Is Lost.
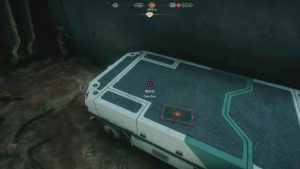
Make your way to the Presidio, following the objective marker. Once you reach the gate that lifts, look at the gas canisters on the right. Resting on the box next to it is the Ranger Report: Checkpoint Bridge Overrun Data Pad.
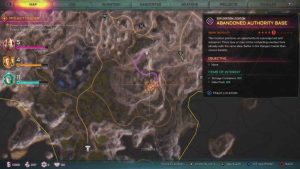
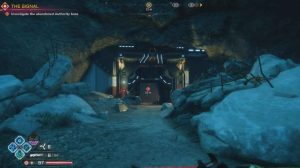
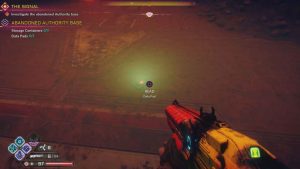
Abandoned Authority Base Exploration Location (Mission: The Signal)
This location can be found just north-east of Vineland.
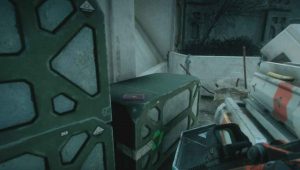
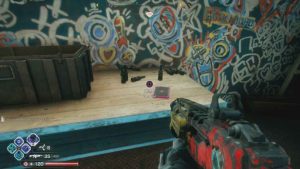
From the entrance, make your way inside the Base. As you reach the first corner, look on the floor to find the first Data Pad, Project Archon – Quality Must Come First.
Continue forward until you reach a large piece of machinery and a few Shrouded enemies. Just past them, on the left side, next to a corner, you can find the next Data Pad, Project Archon – Modular Constructs.


Walk straight ahead to the Authority walls and gates across the bridge. As you reach the corner, look to the left to find the final Data Pad, Project Archon – Underway, on a box by the door.

This Ark can be found to the north-east of Vineland.
Enter the large building and head to the desk at the end of the reception to find another Data Pad, Eastern Dogs Report 264.10.

Make your way through the door and into the next room. On the desk to the right, against the window, you can find a Data Pad, Kvarsir’s Log – Entry 12:234.

The final Data Pad here requires you to pick-up the ability from the Ark. Once you have done so, head up the ramp that has fallen down and scale the ladder. Go through both doors at the top and look to your left for the Data Pad, Assistant Venn’s Last log.
Shrine of Awa Exploration Location
The Shrine can be found in the centre of a raised part of the land on the eastern edge of the region.
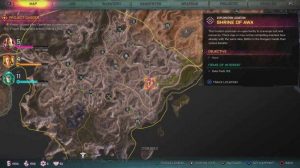
It is located next to the pink bunny on the fire.
The Mountain Fortress Bandit Den can be found in the north-east of the region.

Make your way through the den until you reach the room in the back. Take a right and enter the small room off to the side. On your right, you can find the Data Pad, Gregory’s Logbook.
The Bandit Den can be found in the north of the region, just east of the Mountain Fortress Bandit Den.
From the entrance to the Den, head to the left side of the path and look for a set of stairs. Go up the stairs and continue moving forward, Ahead you will see the entrance to a small room. Inside that room, on a box to your right, you can find the Data Pad, Message To Glisten Success.

Broken Tract Data Pads
The Eden Space Center can be found in the far east of the Borken Tract region. This area is a part of the Ground Control main story mission.
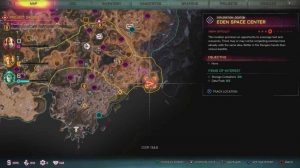
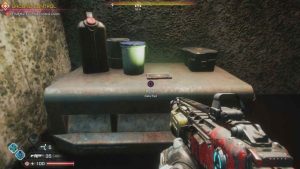
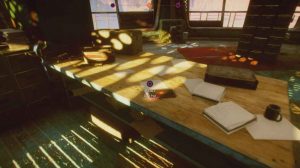
Progress forward until reaching an office with blue dividers. In the back left corner, there is a staircase. Head down them to find a Data Pad, Exciting Excavations #10, at the bottom.
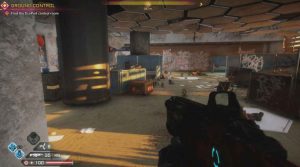
Towards the end of the mission, you will enter the EcoPod control room. As you enter, you can find a Data Pad, RE/Urgent Message!, on a desk to the left.

This Bandit Den can be found just north-west of the Eden Space Centre.
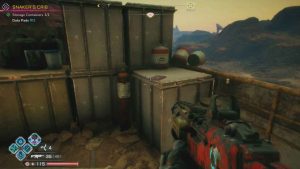
From the entrance, look to the left for some crates. On top of them, you can find the Data Pad, Exciting Excavations #4.
Make your way all the way through the Bandit camp to the circular building in the back. Inside, on the left, you can find the second Data Pad, Fightin’ Fair’s For Fools.
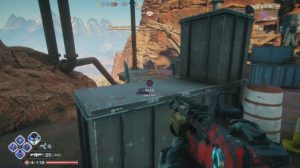
Puggy’s Lookout Exploration Location
This Exploration Location can be found in the northern part of the region.
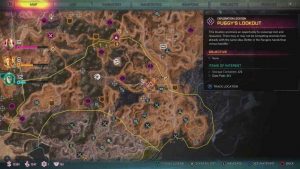
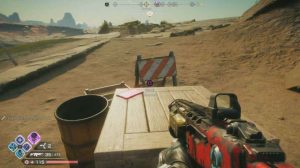
In the middle of the mannequins, on a box, you can find the Data Pad, War Pugs!
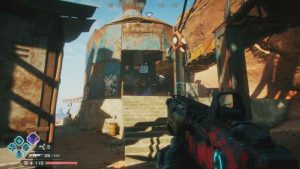
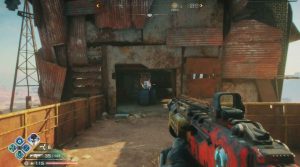
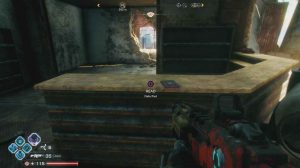
Hillside Resort Exploration Location
This Exploration Location can be found in the northern part of the region just above Puggy’s Lookout.
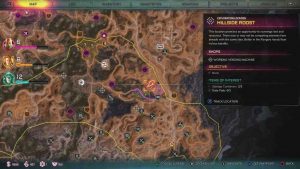
Head inside the central building. On the counter, you can find the Data Pad, Let ‘Em Rip!
This Bandit Den can be found in the north of the region.
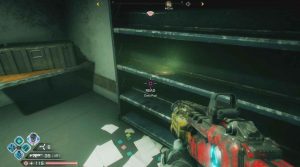
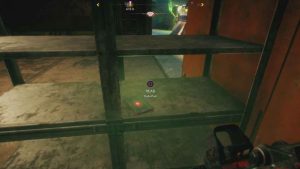
Enter the Bandit Camp and make your way all the way through to the central room. Head through the corridor on the right. On your left, at the end, you can find another door. Inside here, on a shelf, you can find the Data Pad, Hidden For Later.
Snaker’s Crib Exploration location
This Exploration Location can be found on the northern border of the region. It is north-east of the Mutant Bash TV location.
This Exploration Location can be found on the northern border of the region. It is north-east of the Mutant Bash TV location.
Head behind the building and onto the platform. Resting on a box in the corner is the Data Pad, Robo-Buddy.
Death Ravine Exploration Location
This Exploration Location can be found on the northern border of the region. It is north-east of the Mutant Bash TV location.
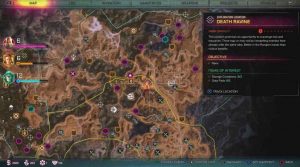
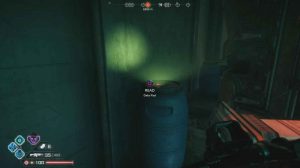
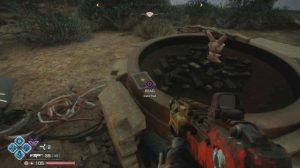
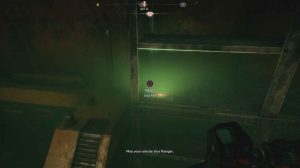
Head inside the cave carved into the side of the mountain. Next to the ladder, you can find the Data Pad, Rozz Journal Entry

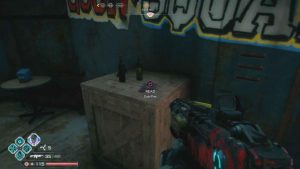
Mutant Bash TV: Killbox Meat Grinder
This Mutant Bash TV location can be found in the northern part of the Broken Tract. It is slightly north-east of Gunbarrel.
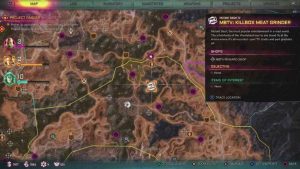
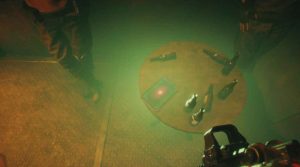
Inside the building, you can see a set of seats in front of you when standing next to the exit. Those seats are surrounding a table and on that table is a Data Pad, entitled Needs More Fire.

This Exploration Location can be found on the Northern border, in the centre of the region.

Head inside the building and up to the second floor. On the desk, you can find the Data Pad, Scout Observation #42.

This Exploration Location can be found on the northern border, in the centre of the region. It is located in the hills of a mountain.
In the middle of the shrine, you can find the Data Pad, Tombstone.

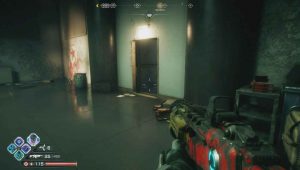
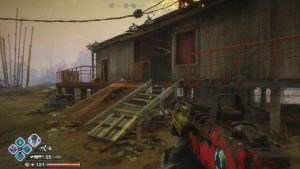
The town of Gunbarrel houses a number of the Data Pads in the Broken Tract. The town can be found in the centre of the region. This town is part of the main Project Dagger storyline.
From the entrance of the town, turn around and enter the garage opposite. Inside, on the workbench, you can find the Bandit Flyer Data Pad.
Head inside the town and take a left as you enter. On the counter of the first shop, you can find the Data Pad, South Road Is Dangerous.
Continue following the path around. In the room after the General Store, the second Data Pad, Caravan Masters – Road Choker Report, can be found sat on the counter.
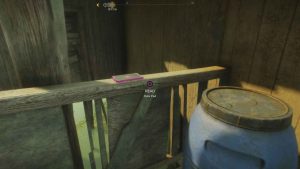
Go back outside and up the set of stairs ahead. Once you reach the top, take a left and you will see an alley. Resting on the metal bar, there is another Data Pad. The Warning: Pestilent Park Pad.

Head back along the main path until you reach the bar. Before heading inside, take the path on your right to find the Exciting Excavations #1 Data Pad sat on the wall.
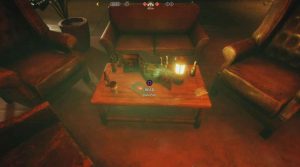
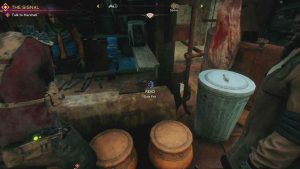
Next, head inside the Bar. On the table, right in front of you as you enter, you can find another Data Pad, The Cactus Jack.
Once on the bottom floor of the bar, take a left as you exit the stairs to find a Data Pad sat on the table. This one is The Legendary Snakers.

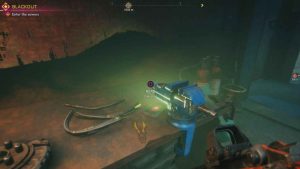
The next three Data Pads can only be obtained after completing the mission: Blackout. Talk to Marshall in the bar to get the mission. Follow the objective marker down the lift and into the sewers. Continue with the mission until you reach Marshall’s armory after using the lift.
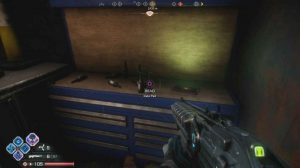
The first Pad, Black Baron – Visions, can be found resting on the table, next to the shelves in the workshop.
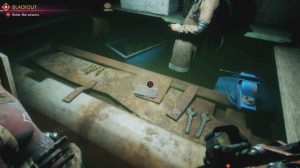
Head into the main room to find the Data Pad sitting on the central console. This Pad is a Message From E. Prowley.
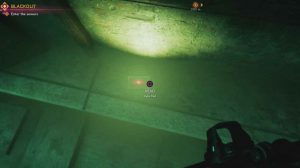
Make your way up the ladder and the set of stairs. Sitting in the middle of the table in this room is the final Data Pad, Greenside Lookout MIA.
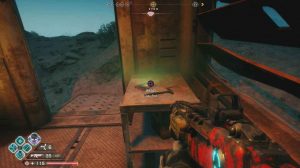
Lost Cause Exploration Location
This Exploration Location can be found in the western sector of the region. It is just north-west of the Great Crack Ark.
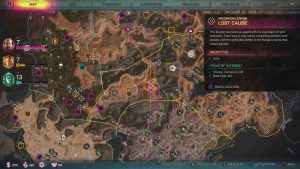
Make your way into the building at the back of the graveyard to find the Data Pad, Damper’s Journal, sat on a table.
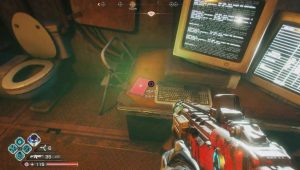
Green Side Lookout Exploration Location
This Exploration Location can be found in the western sector of the region. It is north-west of the Great Crack Ark.
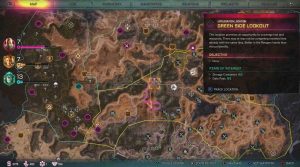
Head up the stairs of the lookout tower. Once you reach the first room, look on your right to find the Data Pad, Exciting Excavations #6, next to some computers.

This Road Choker can be found in the western sector of the region. It is along the southern border.
Position yourself on the eastern side of the Choker and look west. Head up the left set of stairs. On a box, at the top of them, you can find the Data Pad, More Cool Shit – BB.

This Ark can be found in the western section of the Broken Tract region.
As you enter the area, you will see a destroyed building on the left. Inside, on a metal box, you can find the Data Pad, Hot On The Trail.


Torn Plains Data Pads
Secret Bunker Exploration Location
This location can be found in the east of the Torn Plains region.
As you enter the bunker, on the right ledge before the elevator, you can find the Data Pad, Emergency Security Protocol.


Head down the elevator and continue forward until the voice locks you out. To the right, you can find a small vent to climb through. When you come out of the other end, you can find the Data Pad, Memo To The Section Chiefs, on the desk.
Continue forward into the next room. As you enter, look on the desk to your right to find the next Data Pad, Daily Herald Cover Story.

Progress forward through the corridor and into the next room. On the cabinets ahead, you can find the final Data Pad, Daily Herald Cover Story.
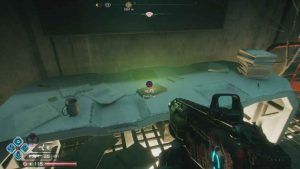
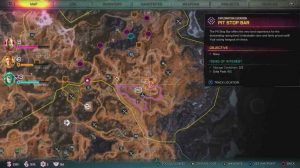
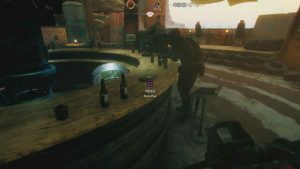
Pit Stop Bar Exploration Location
The Pit Stop Bar can be found just north-east of the Chazcar Derby.
Head to the bar to find the Data Pad, Missing Bartender, on the back side of the counter.
This Ranger Echo can be found just south of the Chazcar Derby. Keep your eye out for a large building.
From the front of the building, head up the set of stairs to the porch. Resting on the table, you can find the Exciting Excavations #2 Data Pad.
Chazcar Derby: Torn Plains Track
The Chazcar Derby can be found in the south-eastern section of the Torn Plains region.

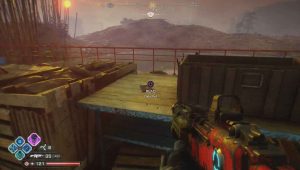
In order to enter the area, you will need to go through a doorway on the right. On a chair, just next to that doorway, you can find the first Data Pad, entitled Pappy Swift’s Patch.
Through the doorway, there is a waiting area, filled with race participants. On the left, two racing participants will be loitering outside of the garage. head around behind them, underneath the traffic lights. Resting on a metal box, you can find the Scare ‘Em Off Data Pad.
Dead Diner Exploration Location
This location can be found to the north-west of the Chazcar Derby.

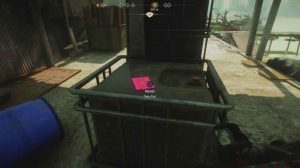
Head inside the dine and into the back room. Resting on the desk in the corner, you can find the Data Pad, Smuggling Stash.

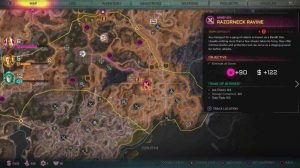
The Strongbox Ark can be found in the Torn Plains region, north of the Chazcar Derby.
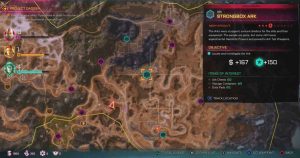
Continue through the area until reaching the Ark. Before scaling the stairs up to the Ark, look to the left for the Mutant Love Child Data Pad on top of a box.
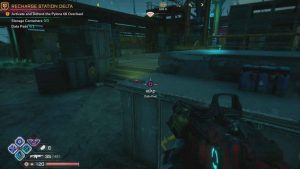
Recharge Station Delta Repowering Station
This station can be found in the north of the region.
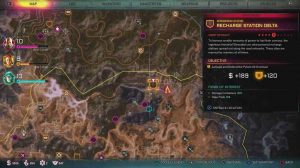
As you enter the area, head towards the tower. On a box, next to the stairs on the left side of the tower, you can find the Data Pad, The Tales of The Skin-Divers.
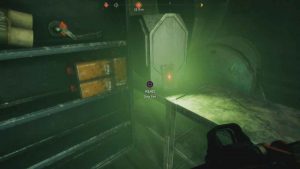
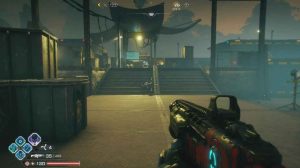
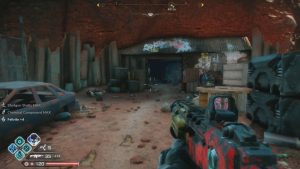
Forward Command Post Bandit Den
This Den can be found in the north of the region, slightly north of Strongbox Ark.
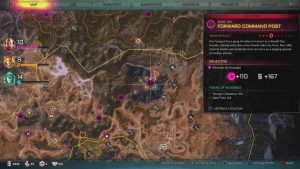
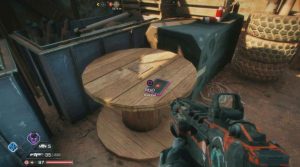
Make your way to the central platform. Sitting on the desk in the centre, you can find the Data Pad, Operation “Hightower” Report.
This Bandit Den can be found in the centre of the Torn Plains region.
Make your way up the elevator and to the upper level of the camp. On the dumpster, just before the path connecting the bridge, you can find the Data Pad, ‘Send Booze!!!’.
Now, make your way to the top level of the Bandit Camp, inside the building with blue walls. Jump up to the second floor to find the Data Pad, Looking For Bombs, on a table.
This Road Choker can be found in the south of the Torn Plains region.
Look to the western edge of the Choker. On the ground level, against a corner, you can find the Cool Shit – BB Data Pad.
This Mutie Nest can be found along the southern border of the region, in the centre.
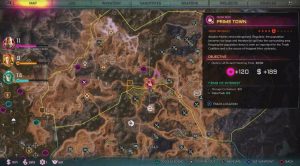
As you enter, look to your left for a set of stairs leading up to the second floor of a building. Take them up to that second floor to find the Data Pad, Getting Up and Running, on the table.

This Bandit Den can be found in the centre of the region, east of Wellspring.
Make your way to the end of the bridge which the Bandit Den is situated on. In the final room, on the left, you can find the Data Pad, ‘Hey, Cousin!’.

Mechanics of Wasteland Exploration Location
This location can be found in the north of the region.
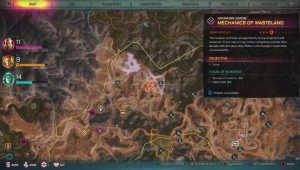
Head inside the building’s lower floor to find the Data Pad, They Are Coming For Me, on a box at the back.
Head outside and climb up to the top floor, through the window. Inside, on the bed, you can find the second Data Pad, I’m Toast.


On The Crack Exploration Location
This Location can be found along the southern edge of the region’s border.
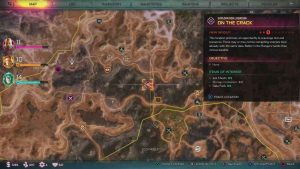
Head into the main building and up the small set of stairs. look to your left to find the Data Pad, The Mutie Fix, sitting on the side.

Quick Stop Exploration Location
The Quick Stop can be found in the western section of the Torn Plains.
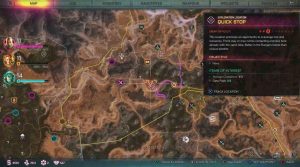
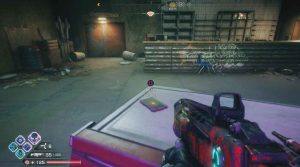
Head inside the building and look for a single crate in the middle of the room. Resting on top, you can find the Data Pad, Bullet Kaiser.

This Pit Stop can be found in the western part of the region, slightly east of Wellspring.
Head inside the central building and look for the toppled over vending machine. Resting on top is the Data Pad, Exciting Excavations #8.

Wellspring is found in the centre of the region. It is a part of the main Project Dagger storyline.
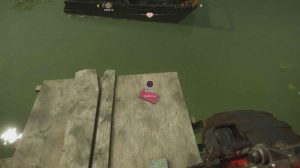
From the entrance of Wellspring, walk up the flight of stairs ahead and take a right. Then, take a left directly after and head to the booths in the back corner. Resting on the right table is the first Data Pad, Get the Gear or Git!

Head back to the staircase you walked up. Next to it is a ramp and at the top of that ramp, resting on a wall, you can find the next Data Pad. This one is entitled Pipe Down.
From that Data Pad, take a right and head out to the courtyard with the statue. Inbetween Jack and Bloody Mary’s shops you can find a small alley.
On the left, behind the first corner, you can find a Data Pad, Message From The Swill Baron.
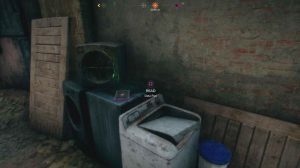
Continue forward and about halfway up, sitting on a rusted washing machine, you can find the I’m Not Paying Pad.
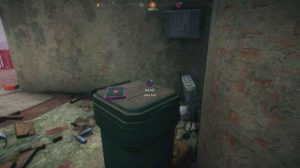
Continue up the alley, until you find a bin with the Use The Dumpster Data Pad on it.
Make your way back to the courtyard with the statue. Behind the statue is the City Hall. To the left of the entrance, lodged in-between two pipes, you can find the Sinkhole Dwell Is Lost Data Pad.
Head inside City Hall and look on the table in the second office on the right. The Report From the Scraplands Data Pad is sitting on it.

Use the elevator that leads to Hagar’s office. As you exit, make a sharp right to find the Wellspring Public Library Data Pad sat on a bookshelf.

From that datapad, stick to the edge of the room and follow it around. Resting on a coffee table, just around the corner, you can find the Mako – Goons Spotted Data Pad.
Next, look on the table behind Hagar to find the Update – south-east Elevator Pad.
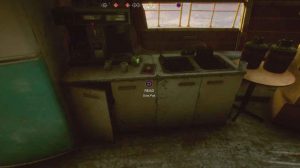
Turn around 180 degrees to find the Wyatt Ferris – New Office Data Pad sat on the side next to the sink and coffee machine.
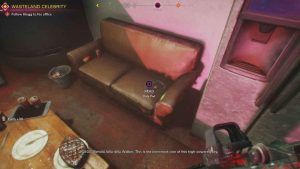
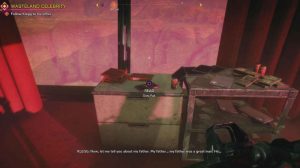
Wellspring (Only Obtainable During And After The Wasteland Celebrity Mission)
After Walker has won a race and completed Mutant Bash TV, Hagar will ask him/her to come back to Wellspring. Once back, head to the Winner’s Lounge and meet Klegg Clayton. He will take Walker up to his office, which has four Data Pads.
Upon exiting the elevator, turn to the right and look on the couch for the Unca Kleggy’s Swamp Swill Data Pad.
Next to the central pillar in the office, there is a small table next to a chair. Resting on this table is another Data Pad. This one is called Industrial Salvage For Ya.

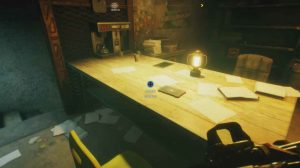
Head up to the desk at the end of his office. Next to the mouse and keyboard, there is a Data Pad entitled Note From Chaz.

Turn around to find the Office Decorations Data Pad on top of a set of drawers.
The next Data Pad can be found after killing Jumbo, the large Mutant Crusher. Head through the door in the corner of the room and up the stairs. The Data Pad, Jumbo Needs Lookin’ After, is sitting on the table.

Continue through the linear area until reaching the mannequin which is staring at the wall. Continue on a little further and turn the wheel on the door at the end of the area. Inside the room behind the door, on a shelf to the right, is another Data Pad, Feeding Jumbo.
Once reaching the room with the tank, jump up to the platform the tank is situated on. Behind the tank, on a desk is another Data Pad, Train My Tank Crew.

Upon reaching the room with the elevator, head along the hallway to the right. Around the corner is a staircase and in the back corner, beneath it, there is another Data Pad entitled Givin’ The Game Away.


This Bandit Den can be found in the western section of the region.
Head to the back of the area and into the building to the right of the large tower. On the table to the left of the entrance, you can find the Data Pad, Dolly The Detonator.


The Wilds Data Pads
Dreadwood can be found in the north of The Wilds region.

Make your way to the back corner of the town, where the two vendors are. Head inside the small shack at the back labelled ‘Supplies’.
Turn to the right and look on a box attached to the wall for the first Data Pad, Send Reinforcements!.
In the corner of the shack, there is a ladder. Before climbing it, look to the right of it for a Data Pad, Exciting Excavations #3.

Climb the ladder and head into the room ahead. On the railing edge to the right, you can find the Warning From Management Data Pad.
Walk out onto the Rooftop seating area and look for a table on the right side with a lamp on it. The next Data Pad, Swill Still Kill, is resting here.
Go back downstairs and head behind the Pepper’s Palpable Promises store. Resting on a bin, next to the door, you can find the final Data Pad, Ark Bonanza.
Goliath Plant Exploration Location (Mission: Beneath The Surface)
The Goliath Plant can be found in the top north-east of The Wilds region
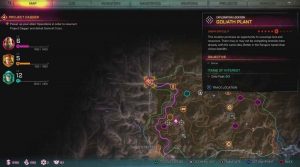
All three Data Pads can be found in the first large arena you enter.

To collect them all, do a loop around the edge of the room clockwise. Along the path to the left, you can find the Data Pad, Project Archon – Combat Trials, against the railing.

Continue looping around. Once you reach the elevator, look on the box to the left to find the second Data Pad, Project Archon – Combat Effective.

Walk past the elevator and continue the loop. Halfway along the walkway, on the opposite side of where the first Data Pad was, you can find the final one on a box by the wall. This one is entitled Project Archon – Neural Interface.

Authority Headquarters Data Pads
Authority Headquarters Exploration Location (Mission: Project Dagger)
All three of the Data PAds can actually be found outside of the Headquarters, which is located just outside of The Wilds region.
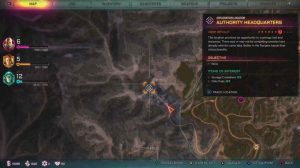
From the end of the road, opposite the entrance, walk to the destroyed van on the right side of the road. Inside the back, you can find the Data Pad, Project Archon – Ready For Development.

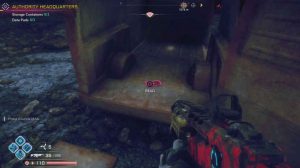
On the box to the left of that Pad, you can find the second one, Project Archon – A Happy Accident.
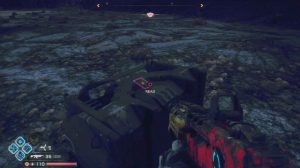
Head to the opposite side of the road to find the third Data Pad, Project Archon – A Worthy Steed, on a piece of rubble.
Sekreto Wetlands Data Pads
This Exploration Location can be found in the north of the region.
Across from the mainland, you can find this area in the swamp. Jump up to the pillar in the centre of the destroyed building to find the Data Pad, Muties With Brains?

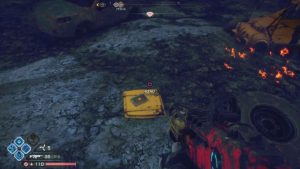
Blood In The Mud Exploration Location
This Exploration Location can be found in the north of the region, along the western border.
This location is on a small island off of the mainland. When standing in the middle of that island, look in a north-east direction to find a dock with a hover-boat. On top of a box on that dock, you can find the Data Pad, Shrouded Team Spotted.

Mutant Bash TV: Slippery Nipple Blasting Range
This MBTV location can be found in the centre of the western edge of the Wetlands.
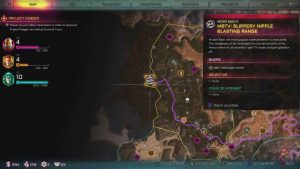
As you enter the door to the vendor, you will find the Data Pad, Arena Closed For Redecoration on the left edge of the doorframe.
This Bandit Den can be found just north of Lagooney.
Make your way up to the top floor of the Den. Inside the room at the top, you can find the Data Pad, Locking Down The Wetlands.

Lagonney is found in the centre of the Sekreto Wetlands region. This town is a mandatory part of the main Ground Control quest.
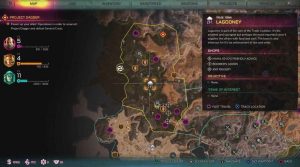
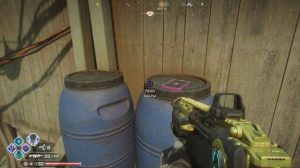
As you enter, go to the right of the bounty board and make your way up along the water. Look for the blue barrel on the floor. The Data Pad, Burrowing Muties?, can be found on the crate next to it.
Return to the bounty board and head up to the Market. Look for a small side alley to your left. On the railing around the corner, you can find the Data Pad. This one is titled The Swill Must Flow.
Go back to the Market and this time take a right. Sitting on the chair, against the wall, you can find the ‘Prime Town has Mutant Trees?’ Data Pad
Jump down to the boardwalk, and make your way up along it. Halfway up you will find a bench next to a refrigerator. Sitting on the bench is another Data Pad. This one is called Hunters Story of Kvasirs Lab.

Turn around and walk across the planks in front of you. At the end, you can find the Exciting Excavations #4 Data Pad.
Make your way back to the market, this time heading to the far left corner. Here you can find a ladder leading down to a walkway. Take a left and continue along it until you reach a set of pipes on the wall. Look to your right to find the Goodbye Ma! Data Pad.

This Road Choker can be found along the eastern border of the region.
Stand on the south side of the Choker and look north. On the right, next to the River Hog symbol, you can find the Data Pad, Coolest Shit – BB.
This Bandit Den can be found in the south-west corner of the region.

Make your way inside the central building. On the right, you can find the Data Pad, ‘Get Your Shit Together!’ on the blue tool shelves.
Head out the back of the building to find the Data Pad, More Fuckin’ Tips From Buggo, on the table outside.
This Bandit Den can be found in the south-west corner of the region.
Make your way into the central building. In the back right corner, you can find the Data Pad, Real Good Fuckin’ By Old’ Buggs.
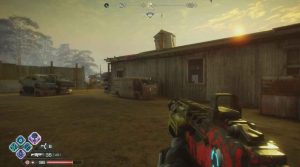

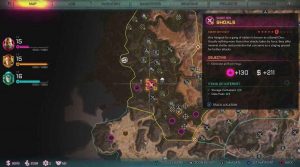
Big Willy’s Scrapyard Exploration Location
This Exploration Location can be found in the south of the region.
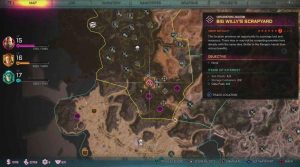
Look to the right of the central building. Jump up to this platform to find the Data Pad, The Ballad of Tugrid Stump.
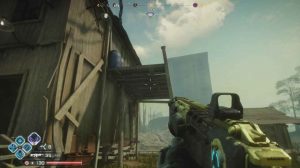
Next, head inside the building and look on the floor, next to the back door. Here you can find the second Data Pad, Buggo’s Final Fuck.

Assblaster’s Junkyard Bandit Den
This Bandit Den can be found in the south of the region.
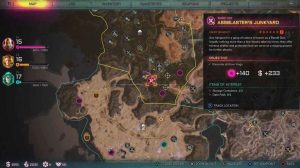
From the entrance to the den, head to the left side and look for a small hut with power lines running to it. Inside, you can find the Data Pad, Exciting Excavations #9.
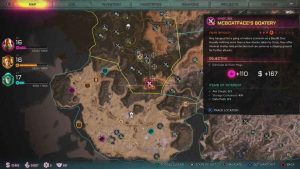
McBoatface’s Boatery Bandit Den
This Bandit Den can be found at the very south of the region.
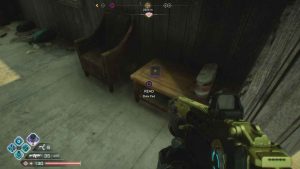
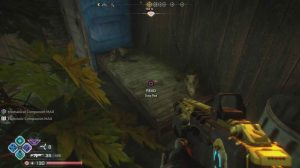
Head inside the central building at the back to find the Data Pad, Captin Crank’s Pirat Advensher, sitting on a bed.
Dune Sea Data Pads
Lazarus Station Exploration Location (Mission: Double Cross)
This Exploration Location can be found in the south section of the Dune Sea.

Right before the entrance of the location, you can see a small box on your right. The Data Pad, Project Archon – Stability Issues, is found resting on top.

Once you go down the elevator, continue forward and take the left path. Right in front of you, on another box, you can find the Data Pad, Project Archon – Combat Effective.

Head through the facility and complete the Double Cross mission. At the end of it, you will exit the facility. Head past the Rangers and down the stairs. To the right, inside a small cell, you can find the third and final Data Pad, Project Archon – A Strong Base.

The town of Oasis can be found in the north of the Dune Sea.
As you enter the town, on your left there is an abandoned garage. Inside on the middle set of shelves, you can find a Data Pad, Dear Death Spitter.
Look at the shelves on the right side of the room to find another Data Pad, Supply Requisition Order From High Command.
Make your way deeper into the town, until you come across the store: Jazz’s Watering Hole. Inside, on a box opposite the counter, you can find the Data Pad, Report: Weather In the Dune Sea.

Recharge Station Alpha Repowering Station
This Repowering Station can be found in the east of the region.
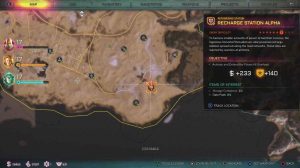
Head behind the pylon and use the ladder on the platform to climb up to the lookout. Resting on the railing, you can find the Data Pad, Close To The Bleeding Edge.


Shrouded Vault Ark and Shrouded Sub Station Alpha & Bravo Electro Forges
The actual Ark doesn’t have any Data Pads. However, in order to complete the Ark, you need to visit two Sub Stations. All three of these locations can be found in the Dune Sea region. At Sub Station Bravo there is one Data Pad.
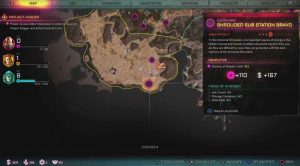
As you enter the building, look to your right to find the Data Pad, Atom Hammer Is The Future, on a metal box.

At Sub Station Alpa, just north of Bravo, look next to the ladder to enter the building for the Data Pad, The Unforgettable Tale of The Shrouded.
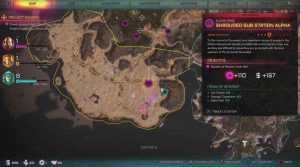

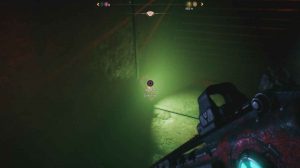
Drop down the ladder and into the vent system. About halfway along you will come across the second Data Pad, The Unconquerable Will of Iron.
Once you reach the room with the lever to pull, head to the opposite side from where the lever is. Resting on a box is the final Data Pad, The Resolute Shield of Sanctity.

Check out our selection of Rage 2 guides:
How To Upgrade Weapons, Where To Find Feltrite & Weapon Core Mods
How To Upgrade Nanotrite Abilities, Where To Find Feltrite & Nanotrite Boosters
How To Upgrade Vehicles, Where To Find Auto Parts
Projects Explained, How To Get Project Points, Projects To Buy First
Ark Guide: Weapons, Nanotrite Abilities Locations Walkthrough